Showing posts with label Nails Inc. Show all posts

Friday, 14 September 2012

31 Day Challenge: Day 14- Floral Nails

Hey guys!

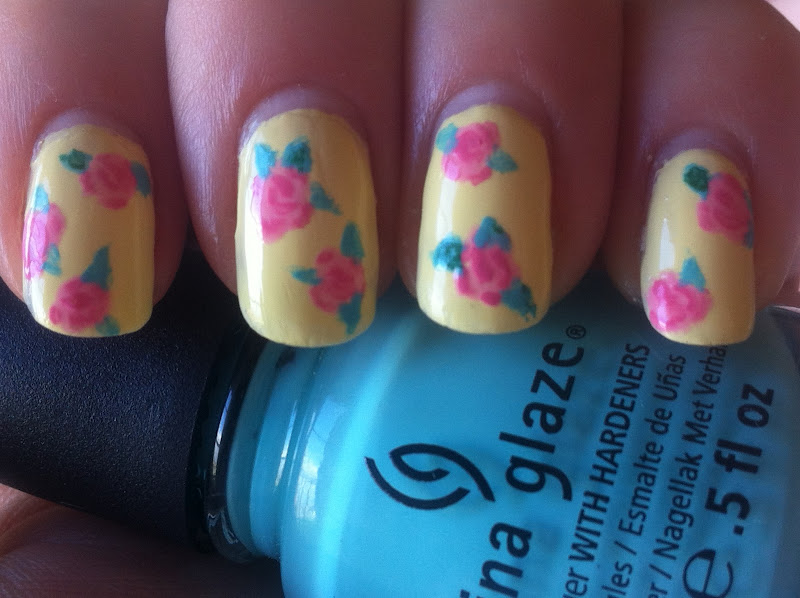
Now, I have never done floral nail art before. I mean, where do you start? A sunflower? Daisy? Hydrangea? (lol) So, I thought about what I wanted to do, and as I was cooking dinner one night, I glimpsed some of my Cath Kidston crockery. Hence this cute little rose design:-

 
Cute or what?!?


I really, really liked how this mani turned out. I think its by far my best work yet! I shall be re-visiting this pattern again soon, and may throw some polka dots into the mix. Or better yet, a whole Cath Kidston inspired mani with a different print for each nail!

Here's a rundown on the polishes I used:-

BASE COLOUR: Nails Inc Sumner Place
ROSE PETALS: Nails Inc Regents Park and Warwick Avenue
ROSE LEAVES: China Glaze Aquadelic and Rio Beauty Green nail art pen.

I can't wait to see what everyone else comes up with for today's challenge!!

Thursday, 6 September 2012

31 Day Challenge: Day 6- Violet/Purple

Woo hoo! I have been looking forward to this day of the challenge! Last week when I was hunting for the recently re-released GOSH Holographic nail varnish, I found a little beauty called Gasoline. When I saw that Day 6 was a violet/purple challenge, I knew that Gasoline would be in the mix:-

 
Look at that shimmer. Oh yeaaahh!


You wanna click on enlarge on all of these pics. Beautiful!
 

I painted my nails in Nails Inc for InStyle in Power Pink first as a base for Gasoline. Once dry, I then applied a wavy nail sticker- like the french tip stickers, only wavy. A good idea here is to stick the template sticker onto your skin a few times, just to take away thereal 'stick.' You don't want to take your base coat away.

I then applied Gasoline above the sticker. Once it had started to dry and was still tacky, I gently peeled the nail sticker away. Once fully dry, I applied glossy top coat.

When the 31 Day Challenge is complete, I am going to dedicate a separate post to Gasoline! Its a beautiful purple-pink and blue fleck shimmer suspended in a clear purple jelly base. It particularly looks amazing under artificial light (strangely looking its best in my local coffee shop!) So, when I do a straight swatch, I shall be experimenting with some lighting!

 
Ugh! Disgustingly beautiful. I <3 Purple!


Tomorrow's challenge is black and white! Another one I have been looking forward to!!

Monday, 11 June 2012

Jubilation Celebrations

Hey everyone!

Well, unless you were living under a rock, you will know that it was the Queen's Diamond jubilee last week. The UK was awash with jubilee limited editions of virtually everything. Vaseline lip therapy, M&Ms, Clarins Hand Lotion.... the list goes on (and on.)

Anyways, the one limited edition product that struck my eye was the gorgeous, glittering Nails Inc Jubilee top coat. Observe:-


I took pics of Jubilee in various different lights so you guys can see just how beautiful it is! Jubilee is a red, blue and silver glitter in a clear varnish. I layered it over some blue, red and white nail paints to achieve a full on, patriotic look! These varnishes are: Rimmel I <3 Lasting Finish in Azure (blue), Nails Inc Milan (red) and Barry M Nail Paint in Matt White. I particularly love how Jubilee looks layered on top of the Matt White, as it really makes the colours of the glitter 'pop'.

And of course, the jubilee celebrations wouldn't have been complete without cake! I recently received a Jubilee special edition of Cake Decorating magazine, which had these beautiful cupcake wrappers and flags, and Sainsburys had the blue, red and white non-pareils on special offer! Here are my home made Jubilee cupcakes:-


So I'd like to know, how did you celebrate her Maj's jubilee?

Monday, 23 April 2012

Saint George's Day mani

Happy Saint George's Day everybody! I created this super simple mani using Barry M nail paints and a Rio Beauty nail art pen.


On the ring finger I used Barry M nail paint in Matt White. Once thoroughly dry, I then used the Rio nail art pen to draw a simple cross. I then used Barry M nail paint in Red Glitter to make it 'pop'. On all my other nails is Nails Inc in Milan, topped with just one coat of the Barry M Red Glitter. I love the glitter varnishes by Barry M, they apply really well and are packed with sparkle.


In direct sunlight to show just how sparkly this Barry M
 nail paint really is!

Non-direct sunlight. I just love this nail paint!

Thursday, 5 April 2012

Baby Pinks Comparison

I have recently been thinking of a few nail art designs that I could do for Easter Sunday, and wanted to incorporate a baby pink into the design. Now, I have quite a few candy/baby/sherbet pinks, and I just wanted to do a few quick comparisons.

I started with the incredibly beautiful Curtain Street by Nails Inc- a baby pink with a matte finish.


Depending on your personal taste, you may either like this polish or find it too sickeningly sweet and cutsie. For me, I think the matte finish just gave the polish a certain edge. Of course, one of the best things about mattes is that they don't require topcoat. However, I of course wanted to test how versatile this polish is, and therefore painted a glossy topcoat on two of my nails.


Like it with the topcoat?! I do! Looking at the two glossy fingernails, do they remind you of a certain recent OPI nail varnish that I reviewed here. Yep that's right, doesn't it look uncannily like OPI's Pink Friday? I just had to crack out my bottle of Pink Friday to compare.


L-R
Index: Nails Inc Curtain Street with glossy topcoat
Middle: Chanel May
Ring: OPI Pink Friday
PinkyNails Inc Curtain Street (remained matte)


 I thought I would throw the Chanel varnish into the mix, because in my memory I remembered it as a soft baby pink. But its not. Its more of dusky rose colour that is even deeper looking in reality. Still pretty, but this is a warm shade, whereas the other two polishes are cool. No prizes for guessing the the Chanel varnish suits my skin tone a lot better, and doesn't make my fingers look like little lobsters!

So what do you think peeps? Can you recommend me any soft pretty pinks ready for my easter nail art session? Feel free to leave a comment!

Wednesday, 7 March 2012

Food Inspired Nails Part 2- Chocolate Philadelphia?!?! Are they MAD?

Take a look at this:


When I heard about this on Twitter, I thought 'Surely not!' But it's true, the chocolate cheese has landed! Philadelphia have teamed up with Cadbury to create this little pot of cheesy, chocolatey madness! Taste taste to follow after the nails!

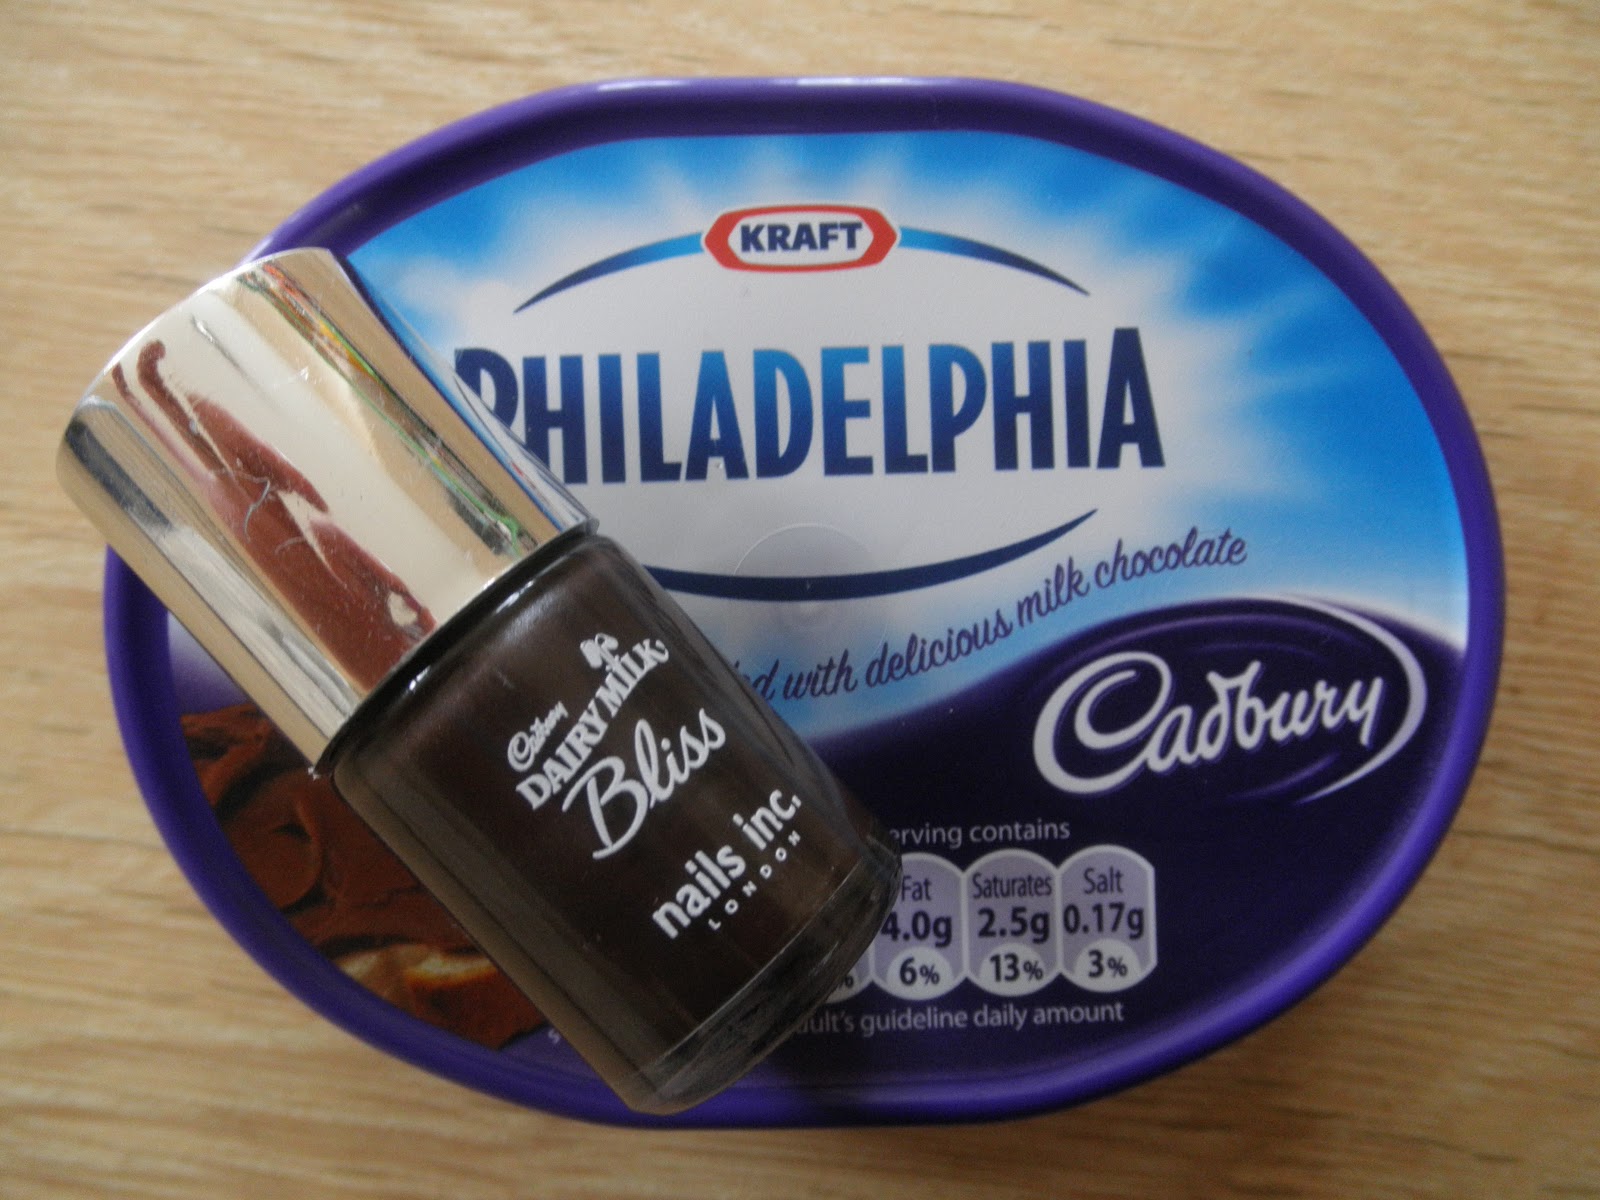
Seeing this Philadelphia reminded me of another Cadbury collaboration, this time with Nails Inc from a couple of years ago. Cadbury had just launched their Bliss bar and were running a competition to win one of Nails Inc's two promotional shades: Vanilla Bliss and Cocoa Bliss. I won this one:

Nails Inc Cocoa Bliss


Cocoa Bliss is a rich, shimmery dark brown shade that is absolutely stunning on. It safely escapes looking a shall we say, disgusting shade of brown (get my hint?) and looks very chic. Observe:

Look at that shimmer in the bottle! Yes!

If you enlarge, you will see the shimmer a bit clearer. This is not a flat brown cream. Its special.


And just for a bit of fun, here is a colour comparison against the Cadbury Philly:

Ha! Not quite the same! I prefer the colour of the varnish!

What did the Cadbury Philadelphia taste like? Well, it pretty much tasted like a regular chocolate cheesecake, without the biscuit base. So, after an initial sample, I reached for a pack of digestive biscuits, topped it with the Philly, et voila! Mini chocolate cheesecakes! If you can get your hands on the packs of mini digestives, these would make a great party snack!

Have you tried the Cadbury Philadelphia yet? 


Food Inspired Nails Part 1- Strawberry Cheesecake Cupcakes

Hey guys, sorry for my absence, I have recently been visiting my family up in the North West, in a small town named Congleton. You may have heard of it, but you probably won't have. (It's that small)
Anyhoo, Mr Claw requested some Strawberry Cheesecake Cupcakes last week to cheer him up (Masters dissertation- say no more), and here's how they turned out:


Yum! I took the recipie from the Hummingbird Bakery Cupcakes and Muffins book, and I think it they turned out pretty nice! They tasted lush, despite the fact that Strawberry is probably my least favourite berry. Mr Claw loved them too, and said that next time, I was to bake cupcakes that I wanted! (Oh! How generous!)

It was after I made these cupcakes that I realised I could do a really simple, but effective nail art design based on the strawberry. I had recently bought some new nail art pens and hadn't taken them for a test drive yet, and every nail polish lover has a basic red creme so I created these designs:-


Not bad, eh? As I said, these are really simple designs, but I think they are effective and eye catching. In hindsight, I'm not so sure of the middle finger pink strawberry, as I think I should have stuck to the primary colours. I love the thumb though! Tasty!

Here is a list of all the lacquers I used to create this look: Barry M Nail Paint in Matte White, MUA Cosmetics Nail  Varnish in U & I, Rimmel Lycra Pro in Show Off, Nails Inc Nail Varnish in Milan, Red, Green and Yellow Nail Art Pens (I got mine from Argos!)

What do you guys think? Let me know!